Calibration Laboratory
ISO 17025: 2017 and NSI/NCSL Z-540-1: 1994 Accredited Calibration Laboratory

The characteristics of electronic components used in all instruments naturally drift over time. Therefore, it is necessary to calibrate instruments at regular intervals to acquire confidence and proof of their accuracy.
Scantek offers traceable, high quality and prompt periodic calibration of any brand of sound and vibration instrumentation that we test in conformance with all applicable standards or to manufacturer’s recommended procedures. Our scope includes microphones, acoustical calibrators, sound level meters and analyzers, accelerometers and vibration meters, or vibration calibrators.
- Turn-around time: 7 to 15 working days upon arrival to Scantek Calibration Lab
- Complete test reports and traceable calibration certificates provided at no additional cost
- Service and adjustments can be performed upon request on select items
- Environmental conditions: all results are provided at actual environmental conditions – temperature 23 ± 3°C; relative humidity 50 ± 30% and at actual atmospheric pressure (approx. 97.0 – 103.0 kPa)
Specials
We are pleased to offer a one-year extended manufacturer warranty every time we successfully calibrate a Norsonic or Rion instrument sold by Scantek, Inc. in the last five years (except for tapping machines).
Announcements
Scantek retains electronic calibration records for a period of ten years. Please request the records you need before this interval expires.
ISO 17025: 2017 and ANSI/NCSL Z-540-1: 1994 Accredited Calibration Laboratory Since 2003, Scantek Calibration Laboratory (SCL) is accredited by the US National Voluntary Laboratory Accreditation Program (NVLAP) under the Laboratory Code 200625-0. NVLAP is part of the National Institute for Standards and Technology (NIST) and is an ILAC (International Laboratory Accreditation Cooperation) Mutual Recognition Agreement (MRA) signatory.
Scantek is accredited for ISO 17025:2017 and ANSI/NCSL Z-540-1:1994 for the Scope of Accreditation that includes microphones, calibrators, sound level meters, dosimeters, sound and vibration FFT, and real-time analyzers, filters, preamplifiers and signal conditioners, accelerometers, velocity sensors, vibration meters, and vibration exciters.
Our Certificate of Accreditation
Through the accreditation process, Scantek demonstrated the technical competency to produce accurate, traceable calibration data. As part of accreditation process, Scantek is periodically audited on-site by teams comprising expert assessors with knowledge of the management and technical requirements of the standards, but also having specific expertise in the types of tests, measurements or calibrations in our scope.
Using an accreditation body having a Mutual Recognition Arrangement (MRA) with the International Laboratory Accreditation Cooperation (ILAC) guarantees national and international recognition of our accreditation and test results.
Brands and Instruments We Calibrate & Standards We FollowManufacturers (not inclusive)
- Norsonic
- Rion
- Castle
- Pulsar
- CESVA
- Brüel & Kjær
- Larson Davis
- Cirrus
- Studio Six Digital
- GenRad
- CEL
- G.R.A.S.
- Ivie
- TES
- Delta, Delta Ohm
- ACO Pacific
- Quest
- Ono Sokki
- Radio Shack Schenck
- Simpson
- Soft dB
- Svantek
- 01dB
- Endevco
- PCB Piezotronics
- Sinus and more
Sound and Vibration Instrumentation
- Microphones 1″, ½”, ¼”
- Microphone Free-Field Response
- Low-noise microphone systems
- Intensity probes
- Preamplifiers & signal conditioners
- Acoustical calibrators & pistonphones
- Dosimeters
- Sound level meters (type 1 or 2)
- Real time analyzers (RTA) with one or more channels
- FFT analyzers
- Analog or digital filters sets: 1/1 OB and 1/3 OB, class 0, 1, 2, 3 and all subtypes (ANSI S1.11, IEC 1260)
- Vibration meters
- Accelerometers & velocity sensors
- Vibration exciters & calibrators
- Tapping machines
- Computer-based single and multi-channel sound and vibration measurement systems
Standards met:
- ANSI-S1.11, S1.15, S1.40, S1.25, S1.4, S1.43
- IEC-61094, 60942, 225, 61252, 61260, 61672-3: 2006 & 2013
- ISO-17025 , ANSI/NCSL Z-540 compliant
- ISO-5349, 8041, 16063-21
In addition to the above, SCL calibrates tapping machines (not accredited service) in accordance with ASTM E492-04 or E 1007-04e1.
6430 Dobbin Road, Suite C
Columbia, MD 21045
U.S.A
- Enclose a Purchase Order or a letter detailing the service requested and a detailed packing list.
- Provide contact information for technical communications (e-mail is preferred).
- Provide customer name and address as you want to appear on the certificates.
- Provide the calibration interval for each instrument.
- Provide return ship-to address of equipment.
- Indicate the preferred payment method. (Payment by check is preferred but we also accept AmEx, MasterCard, and Visa). Do not include credit card information: when the work is finished we will contact you for the payment.
- Contact us in advance if you need to schedule a rush service (additional fees apply).
Specifics for sound level meters, analyzers, and sound measuring systems:
Due to existence of multiple standards (international and national) that may apply to one sound level meter/measuring system we need you to choose the one we should use for testing, from the following options:
- Option 1: IEC 61672-3: 2013 – also adopted as US national standard ANSI S1.4-3:2014
- Option 2: ANSI S1.4:1983 & ANSI S1.43:1997 (superseded by 2014 edition)
- Option 3: IEC 61672-3:2006 (superseded by 2013 edition)
- Option 4: IEC 651:1979 & IEC 804:1985 (both withdrawn)
We need your selection before we start the work.
The quotes for calibration services do not include repairs. Shipping and insurance are additional. A processing & handling fee is applied for each order or split orders.Notes:
1. The calibration documents indicate which and if the tests are covered by our NVLAP scope of accreditation.
2. All test results are provided at no extra cost.
3. Each instrument is admitted for calibration only after a functional check that will determine if it is working properly.
- If the instrument is not admissible for calibration and no other action is taken, an evaluation fee of $75 is applied.
- If the instrument is admitted for calibration but it fails one or more of the tests, the customer will be contacted to determine further action. The “as found data” will be provided. A test charge of 75% of the calibration cost will be applied for rejected instruments.
4. The standard calibration service for type/class 1 sound level meters includes separate calibration of the microphone, while for type/class 2 instruments the microphone is tested along with the instrument. The preamplifiers are tested along with the sound level meter.
5. We usually test microphones from 100 Hz and up. If you need a different frequency interval, please mention it in your request.
6. Our standard calibration service includes partial test of the filters sets: for each set, we test the relative attenuation of the two filters with highest central frequency. Additional tests on the filters are available as a separate service.
7. Due to the existence of multiple standards (international and national) applicable to your sound level meter(s), we need you to choose the standard we should use for testing, from the following options:
- Option 1: ANSI S1.4 & ANSI S1.43 (current in USA)
- Option 2: IEC 61672-3 (current in other parts of the world)
- Option 3: IEC 651 & IEC 804 – still used in some countries in South America.
- Option 4: IEC 61672-3: 2013 – recently adopted as national standard in US
We need your selection before we start the work.
8. For multi-channel systems, we fully test one channel, and for the remaining channels we only perform the tests that focus on the hardware parameters.
9. In order to keep the prices low, we limit our communications on the status of the work to the cases where there are issues or we need more information. We encourage our customers to track for themselves the delivery of the packages to our location.
10. Important: Scantek retains calibration records for a maximum of five years
Turnaround time from instrument receipt (except shipping):
- – 7 to 15 working days upon arrival to Scantek Calibration Lab
- – Expedite orders: Three working days upon arrival to Scantek Calibration Lab, depending on the size of the order. Additional fees may apply.
- Based on the ISO 17025 requirements, Scantek does not provide a calibration interval on calibration sticker or certificate unless specified in writing by the customer and agreed by both parties.
PAYMENT TERMS: NET 30 DAYS. Payable in US funds on a US bank. Payable by check, AmEx, Visa, or MasterCard. Other terms on request. Occasionally, we may ask for prepayment of the service.
Guide to Calibration
In order to better explain the calibration process of acoustic and vibration instruments and the standards involved, we wrote a short paper that may provide a better understanding of our calibration lab and what sets Scantek Inc. apart from the rest.
Click on the link below to view the document:
A Guide to the Definitions, theory and Applications of the Calibration of Acoustic and Vibration Instrumentation
Below is a section of various sample calibration reports
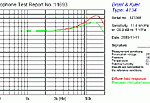
Sample Microphone Calibration Chart

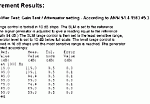
Sample Report for an Acoustic Calibrator

